Saturday, August 29, 2020

vSAN File Services Configuration

vSAN File Services Configuration Steps

What is it?

vSAN File Services is a new feature introduced in vSAN 7.0 that allows objects to be shared via the NFS Protocol (either version 3 or 4.1). This is achieved via appliances running Photon and containers. This feature uses three appliances (will run with a minimum of two) and a maximum of 8. Each appliance uses 4vcpus and 4 or 8 GBs of RAM depending of the version. While setting this up, be aware of the Check Upgrade feature that allows the appliances to be upgraded (rolling upgrade) if new versions are available. According to Cormac Hogan a couple of days ago, 7.1 supports the SMB protocol as well as Kerberos + A.D.

Initial Steps

1. Select your vSAN Cluster, click on the Configure Tab and select Services


2. Click on Enable to the right of File Service and click on Next.


3. Load the OVF for the appliances Manually or automatically.


4. Wait for the task to conclude before clicking on Next. 


5. Specify a File Service Domain (any name, used internally only) and DNS information.


8. Specify a Port Group for the appliances and a Subnet Mask plus Gateway


9 . Specify the IP addresses of the three appliances plus their DNS names.


10. Click on Next and Finish.


What Happens Next

1. A resource pool gets created called ESX Agents with appliances get created and powered on


Create an NFS Shares

1. Select your vSAN Cluster, click on Configure and select  File Server Shares under vSAN


2. Click on Add and select a name for the Share. Add quotas and click on Next. 


3. Click on Allow Access from any IP or specify certain clients


4. Click on Finish.


5. Look at the end result.


How to Monitor the state of the Service


How to Monitor the capacity of the Share


Thursday, July 30, 2020

vSphere 7 and ADFS

How To Configure vSphere + ADFS

vSphere 7 introduces support for Active Directory Federation Services as an external identity Provider. 
The idea is to be authenticated by ADFS and NOT by SSO. 

Prerequisites:

ADFS for Windows Server 2016R2
ADFS connected to Active Directory
An Application Group for vCenter Server to be created in ADFS
An ADFS server certificate signed by a Trusted CA

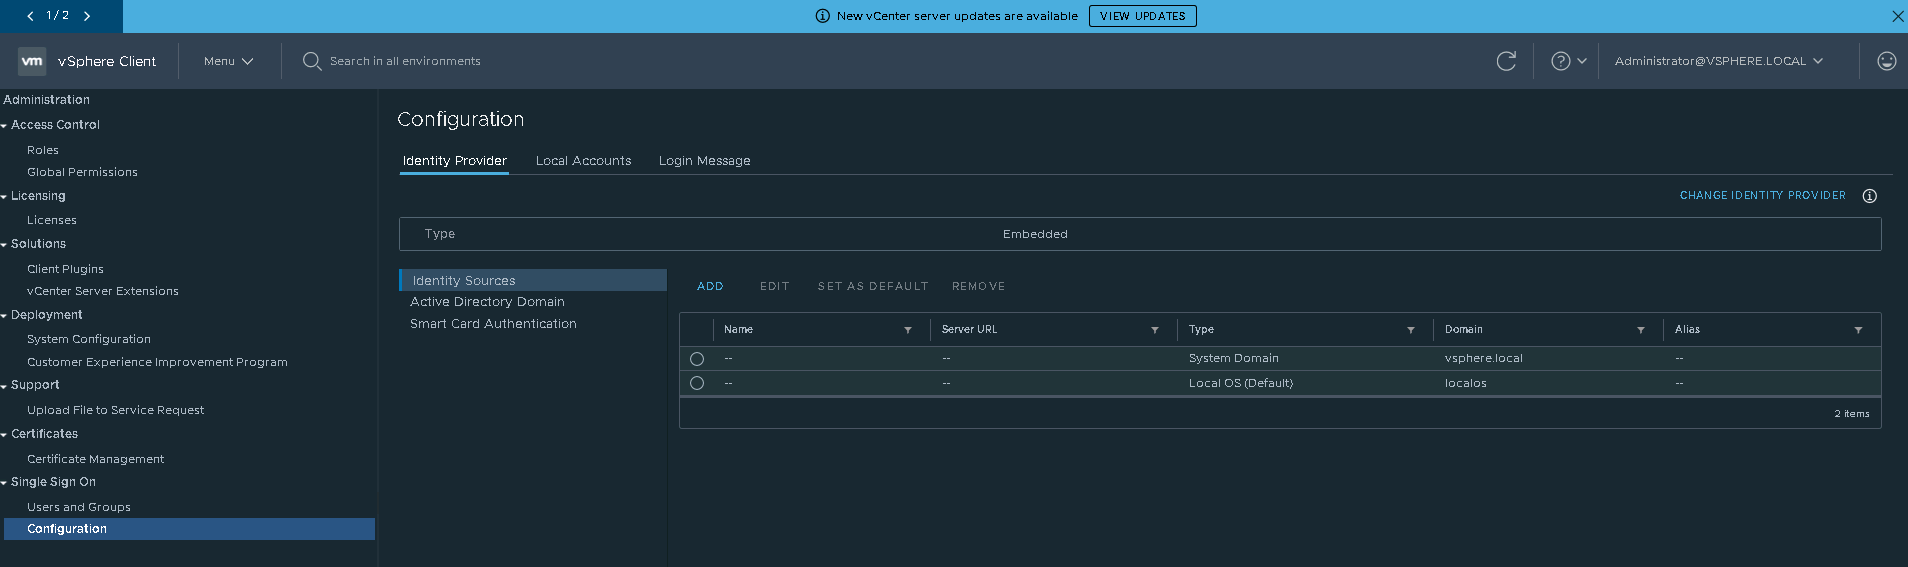
1. Configure Active Directory Federation Provider by clicking on Configuration under SSO. 


2. Select the option "Change Identity Provider"


3. Configure the ADFS settings


4. Provide the Base distinguished name for users and groups plus the Primary URL. Make sure to scroll down and NOT miss the SSL Certificate section. 


5. Click on Finish.


6. Verify the settings and click on Finish.


7. Add permissions for the ADFS administrator account. Bind him to the Admin role.


8. Log into vSphere as the domain user and notice how you are redirected to your corporate page.

Saturday, May 30, 2020

vsantop command

What is vsantop?

vsantop is a new vSAN related command that first appeared on vSphere 6.7U3. Similar to the esxtop command, vsantop has lots of interesting options that can show all sorts of vSAN related information.
This utility can be run in batch mode by using the "-b" option combined with the "-d" option to specify the delay plus the "-n" option to specify the number of iterations.

1. putty into an esxi host and type "vsantop" to see the default "host-domclient" view (entity).


2. type "h" or "?" to get help


3. type "s" to change the seconds to delay (refresh rate)


4. type "E" to change entieties/views


5. Type "f" or "F" to potentially add or remove columns


6. type "o" to potentially change the order of the columns


Examples:

system-pmem option:


cache-disk option (the host has 1 cache disk):


capacity-disk option (the host has 2 capacity disks):


vsan-pnic-net option (the host is using 1 nic):


disk-group option (the host has 1 disk group):


6. Type "q" for quit

Friday, May 22, 2020

The psql command

1. Use to psql command to start using postgres commands


2. Use \h to view all sql commands


3. Use the \h option followed by a command to learn how to use such command


4. Use \? to view all postgres commands


5.  Type \l+ to check the sizes of the databases


6. Connect to the vCenter database and verify connectivity


7.  Use \dt to list all tables


8. Use \z to view all tables, views and sequences


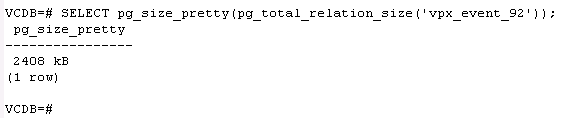
9. Use the following command to view the size of a particular table


10. Use \du to view all users and their roles


11 . Use \s to view previously executed commands


12.  Use \q to quit


service-control examples

service-control examples

1. Use the --help option to view available subcommands


 2. Use the --list option to learn about what these services are for


3. Use the --status option to view which ones are running

 4. Use the following options to learn about dependencies and start the services