What is Orchestrator?
Orchestrator is a very powerful tool that simplifies the automation of complex IT tasks. It is very powerful and can be configured in older and newer versions. Here are the steps.
1. Download the ovf/ova from vmware.com/downloads
2. Burn it into a DVD (optional)
3. Connect the vsphere client to the Vcenter Server (linux or windows versions)
4. Install appliance via ovf/ova and go through the wizard. Make sure you don't install it while connected to the esxi host or you will not see the next capture. Provide the necessary settings to set up a static ip address.

5. Boot up the appliance and view the settings. Notice that the appliance uses 3gbs of ram. Do not lower that amount. Notice it uses 2 vcpus.

6. Open up the console to understand how to proceed. You will see the ports needed for additional configuration.
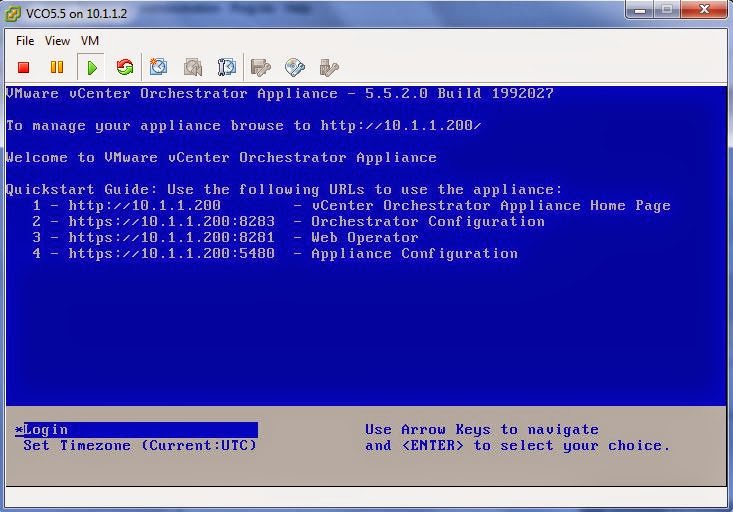
Note: You can always connect to the appliance to port 5480 (just like the the vcenter server).

7. Launch your browser and connect to the ip address of the appliance. Just use the ip. The browser will be redirected to port 8281.

8. Click on the Orchestrator Configuration link. You will be redirected to another page and you will have to log in. Use the "vmware" account to log in and add the password specified in step 4.

9. In order to configure Orchestrator, you will have to click take care of the ssl certificates and register the appliance with the vcenter and sso.
10. Go to the Network link and take care of the networking section.

11. Select the SSL Trust Manager tab and import the certificates of the vcenter server first and then the SSO server. The format is https://ip_of_vcenter:443/ and https://ip_of_sso:7444/

12. Go to the Authentication Tab and select SSO authentication. The format is https://ip_of_sso:7444. The user is administrator@vsphere.local and it's password. Register Orchestrator and add vsphere.local.Administrators to the group. Finally click on Orchestrator Configuration.

13. To finish the setup of the Orchestrator Appliance, click on Startup Options and restart the service.
14. Download the Orchestrator Client. Connect your browser to the appliance and download it.
15. Install the Orchestrator Client. I installed it into a Windows 7 system.


16. Log into the Web Client as administrator@vsphere.local to see if Orchestrator registered successfully..

17. Launch the Orchestrator Client and log into the appliance as administrator@vsphere.local.


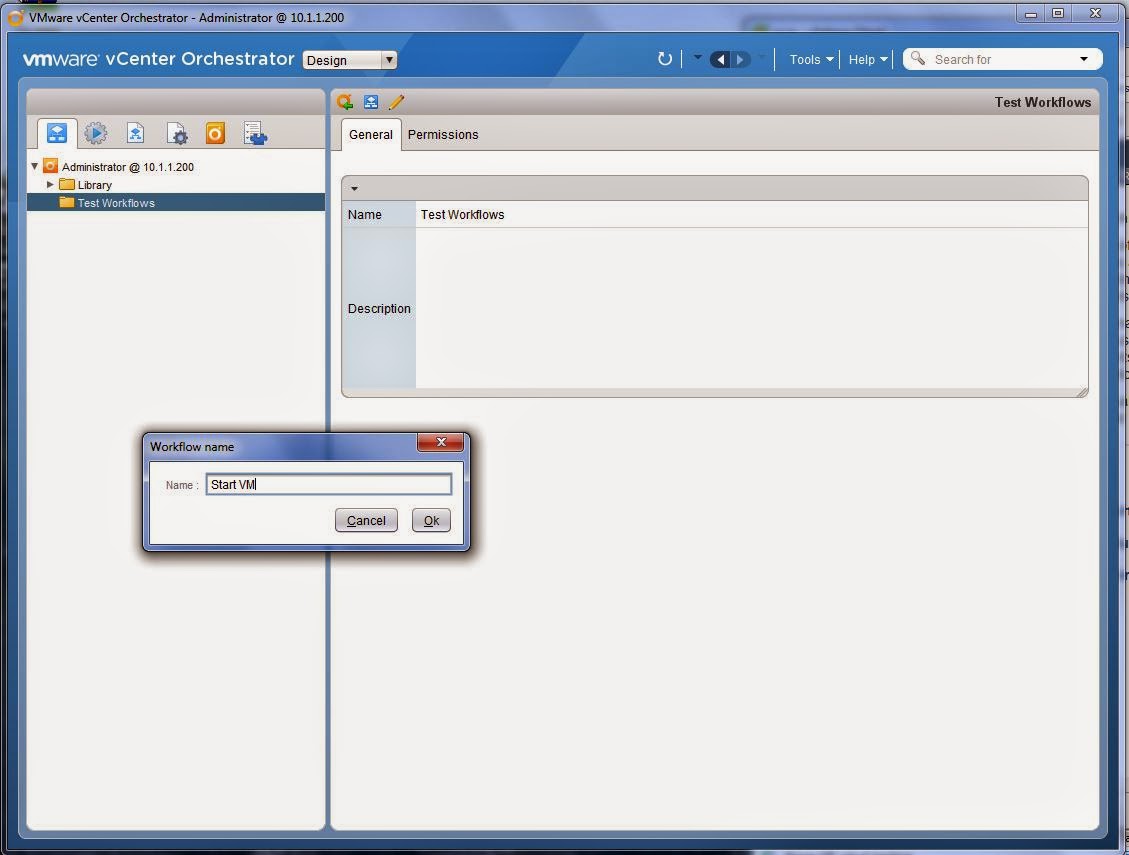
18. It's finally time to test drive Orchestrator. In order to do that, you need to change from Run Mode to Design Mode. As you do that, the system will ask you to create a folder and name it. I named mine Test Workflows.

19. Right Click on the folder created and Add a new Workflow. Name the workflow. You can see in this capture that the workflow needs a name.

20. Provide a version number for the workflow and save it.

21. Go to the Schema Tab

22. Drag an Action Element to the workflow you created.

23. In the Filter Field, input vm to narrow the search of actions.

24. Select Start VM (VC Task)

25. Select the workflow and Edit it. Go to the Visual Binding Tab
26. Drag the "VM" and "Host" entries to In Parameters. Drag "Action Result" to Out Attributes. It should look like this.
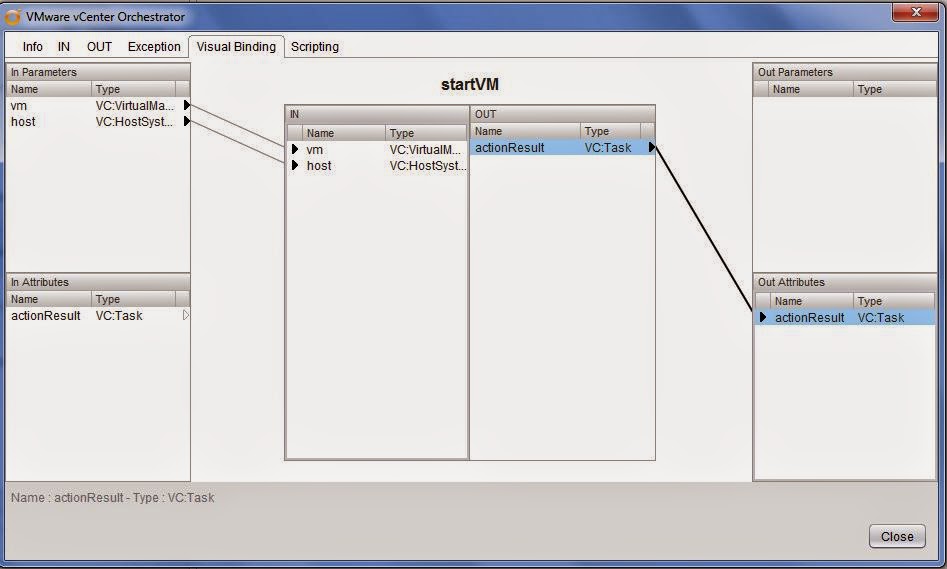
27. Save
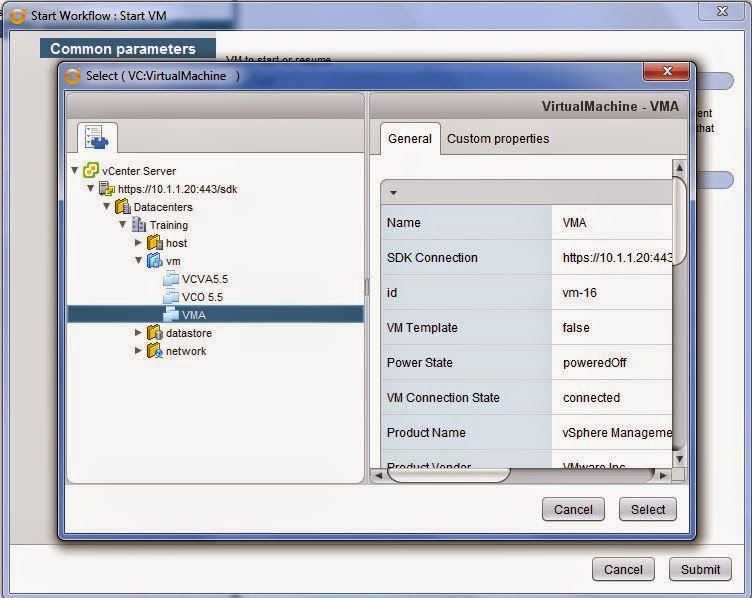
28. Test the workflow by running it.

29. Notice the results in both the vsphere client (or web client).

30. Notice the results in the Orchestrator Client.

Final Note: Take a look at what else is available. It takes less than a minute to configure some of these workflows and you can automate lots of things. For example, you can create workflows to change the number of cpus, modify the amount of RAM for a vm, remove all snapshots and so forth.
.JPG)