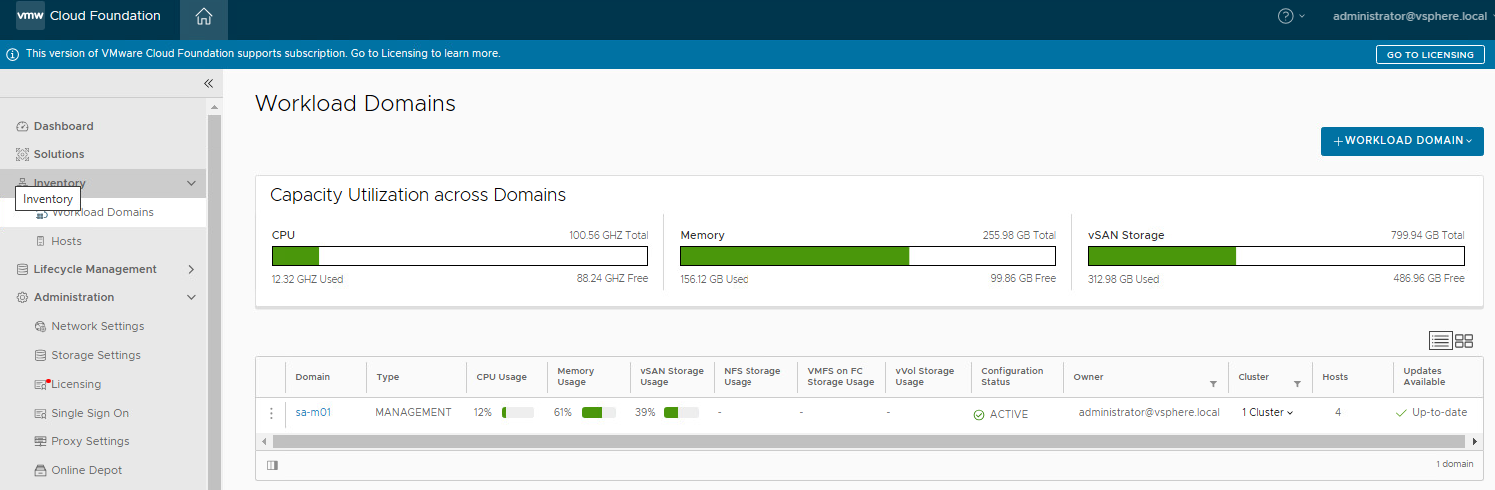
How to add a VCF Workload Domain
1. Using the SDDC Manager, click on Workload Domains on the left.
2. Click on +Workload Domain on the Upper Right to create a new one.

3. Select the Storage Type to be used by the Workload Domain.

4. Select the Virtual Infrastructure Name and SSO Domain information. Click on Next.

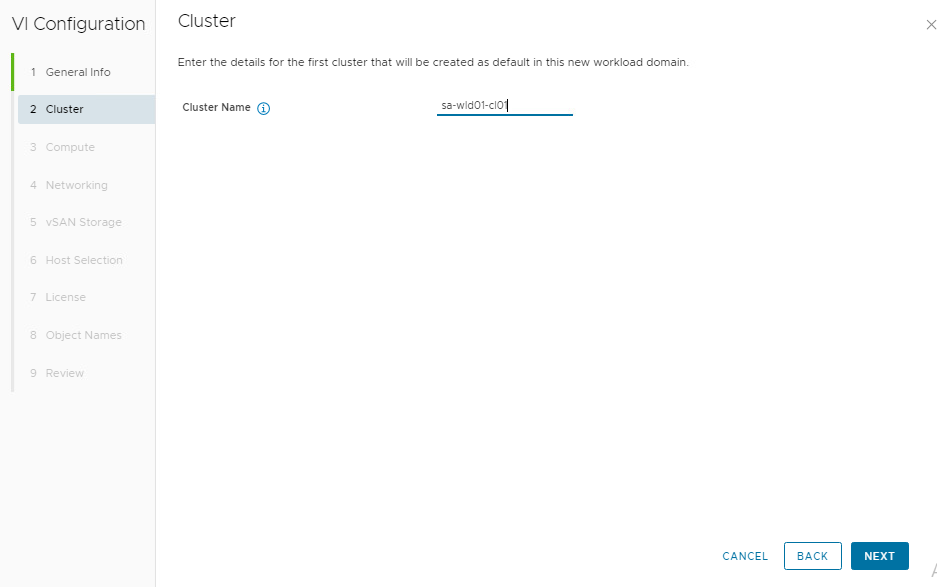
5. Specify the name of the Cluster and click on Next.
6. Enter the information about the new vCenter Server that will control this Workload Domain.

7. Specify the name of all the hosts that will belong to the new cluster.

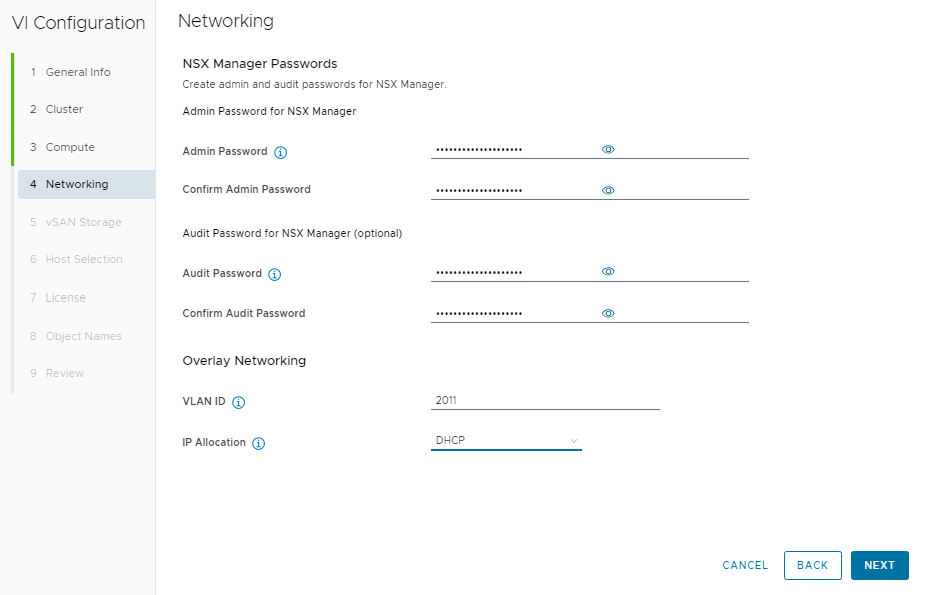
8. Add the NSX Manager information for that Workload Domain.
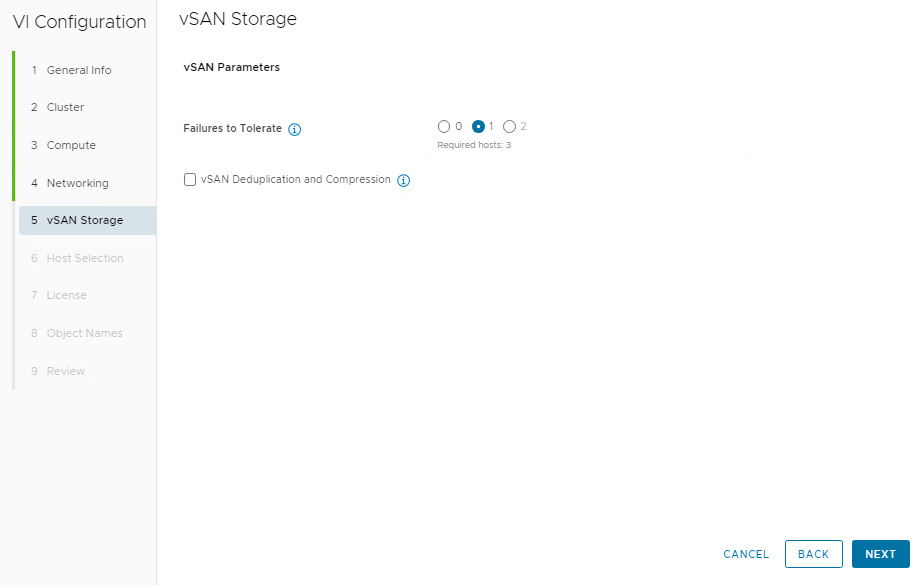
9. Specify the vSAN Failures to Tolerate (FTT) option that you want to use and click on Next.
10. Verify the host related information and click on Next. Then select the licenses to use for vSphere, NSX and vSAN and click on Next again.

11. Verify all of the information and click on Next.

12. If everything looks correct, click on Finish.

13. Verify that your tasks succeed and that the domain gets created.


